Mozilla Firefox is the most customizable browser. Thousands of developer & millions of users are part of Mozilla community & makes it one of the best browsers in the world. Very few of us know that Firefox allows us to create different profiles & those can be used together. This is extremely
useful when you want to maintain different cache, profiles, Logins, site history, add-on, themes & many more things.
For ex. I can use one profile for my office work, one profile for blogging and another profile for my personal work & social sites. This feature helps us in keeping things organized

2.It will open Run window.
3.Now enter Firefox.exe –P and click OK

4.This will open New window showing default Firefox profile.
5.Create a New Profile & assign a Name and now you should be able to see 2 Profiles.

2.You can just copy/paste the current Mozilla shortcut , then open up the properties page and go to the Shortcut tab.
3.Paste Following code at the end of Target Box.

4.Replace Blogshippo with your new profile name & press OK. This method works in Firefox 2.2 & later versions.
For ex. I can use one profile for my office work, one profile for blogging and another profile for my personal work & social sites. This feature helps us in keeping things organized

How to Create Multiple Profiles on Firefox
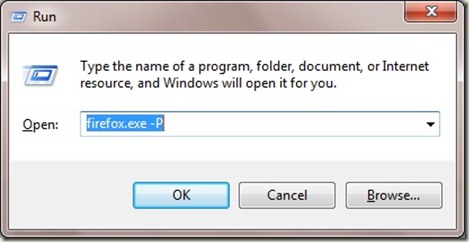
1.Press Windows + R.2.It will open Run window.
3.Now enter Firefox.exe –P and click OK

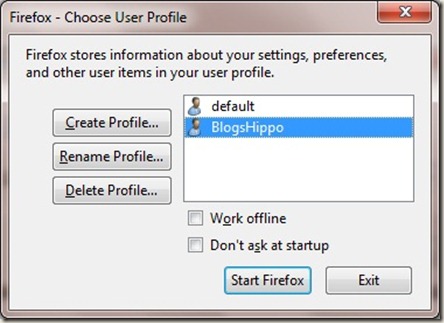
4.This will open New window showing default Firefox profile.
5.Create a New Profile & assign a Name and now you should be able to see 2 Profiles.

How To Create Shortcut For Specific Firefox Profile
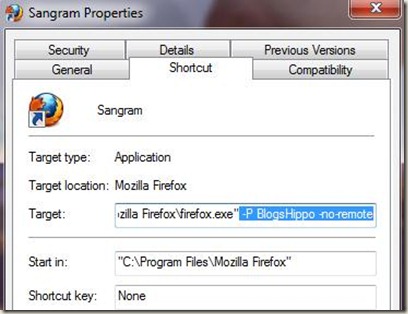
1.Suppose you don’t want to see the Choose Your Profile window every time & for that you can create shortcut for your new profile by using following command.2.You can just copy/paste the current Mozilla shortcut , then open up the properties page and go to the Shortcut tab.
3.Paste Following code at the end of Target Box.
-P BlosHippo -no-remote

4.Replace Blogshippo with your new profile name & press OK. This method works in Firefox 2.2 & later versions.
Mozilla Firefox is the most customizable browser. Thousands of developer & millions of users are part of Mozilla community & makes it one of the best browsers in the world. Very few of us know that Firefox allows us to create different profiles & those can be used together. This is extremely
useful when you want to maintain different cache, profiles, Logins, site history, add-on, themes & many more things.
For ex. I can use one profile for my office work, one profile for blogging and another profile for my personal work & social sites. This feature helps us in keeping things organized

2.It will open Run window.
3.Now enter Firefox.exe –P and click OK

4.This will open New window showing default Firefox profile.
5.Create a New Profile & assign a Name and now you should be able to see 2 Profiles.

2.You can just copy/paste the current Mozilla shortcut , then open up the properties page and go to the Shortcut tab.
3.Paste Following code at the end of Target Box.

4.Replace Blogshippo with your new profile name & press OK. This method works in Firefox 2.2 & later versions.
For ex. I can use one profile for my office work, one profile for blogging and another profile for my personal work & social sites. This feature helps us in keeping things organized

How to Create Multiple Profiles on Firefox
1.Press Windows + R.2.It will open Run window.
3.Now enter Firefox.exe –P and click OK

4.This will open New window showing default Firefox profile.
5.Create a New Profile & assign a Name and now you should be able to see 2 Profiles.

How To Create Shortcut For Specific Firefox Profile
1.Suppose you don’t want to see the Choose Your Profile window every time & for that you can create shortcut for your new profile by using following command.2.You can just copy/paste the current Mozilla shortcut , then open up the properties page and go to the Shortcut tab.
3.Paste Following code at the end of Target Box.
-P BlosHippo -no-remote

4.Replace Blogshippo with your new profile name & press OK. This method works in Firefox 2.2 & later versions.
